
Day 89: Rescue the Gorilla
When Overlord becomes available, finish the rescue/recovery story. During recovery, complete the special supply Radar tasks and collect the baby Gorilla's supplies every day.
You do not need to learn every Overlord system at once. Follow the path below in order. It shows what to do first, what to save, how to progress as F2P, and what to upgrade after the Gorilla can join your squad.
Day 89 falls in Celebration Week 5. When it opens, begin the Gorilla rescue/recovery path. Before Day 89, keep normal account growth moving and save any scarce Overlord materials that appear.
If you remember only one section, use this one. Your goal is to move through these steps without wasting scarce materials.
When Overlord becomes available, finish the rescue/recovery story. During recovery, complete the special supply Radar tasks and collect the baby Gorilla's supplies every day.
Use the Tactical Institute, Overlord Radar tasks, events/stores, and Overlord Expedition. Do not spend just because a button is available.
Level Joint Attack, Defense Support, and Survival Training together. All three are required for progression, so do not leave one far behind.
When the Bond step opens, take it. Then continue all three training tracks toward Lv100.
Finish the required Bond progression. Rookie Partner I is the key deployment gate that lets the Gorilla join a normal squad.
Prioritize the best skills, move Promotion at useful breakpoints, keep Expedition working, and use battle reports to decide whether you need more survival or offense.
Spend toward the next gate, not toward whichever upgrade button lights up. Before deployment, that means balanced training and Bond progression. After deployment, it means focused skill and Promotion upgrades.
Use this when you want the whole progression path on one screen. Tap the image to open the full-size version.
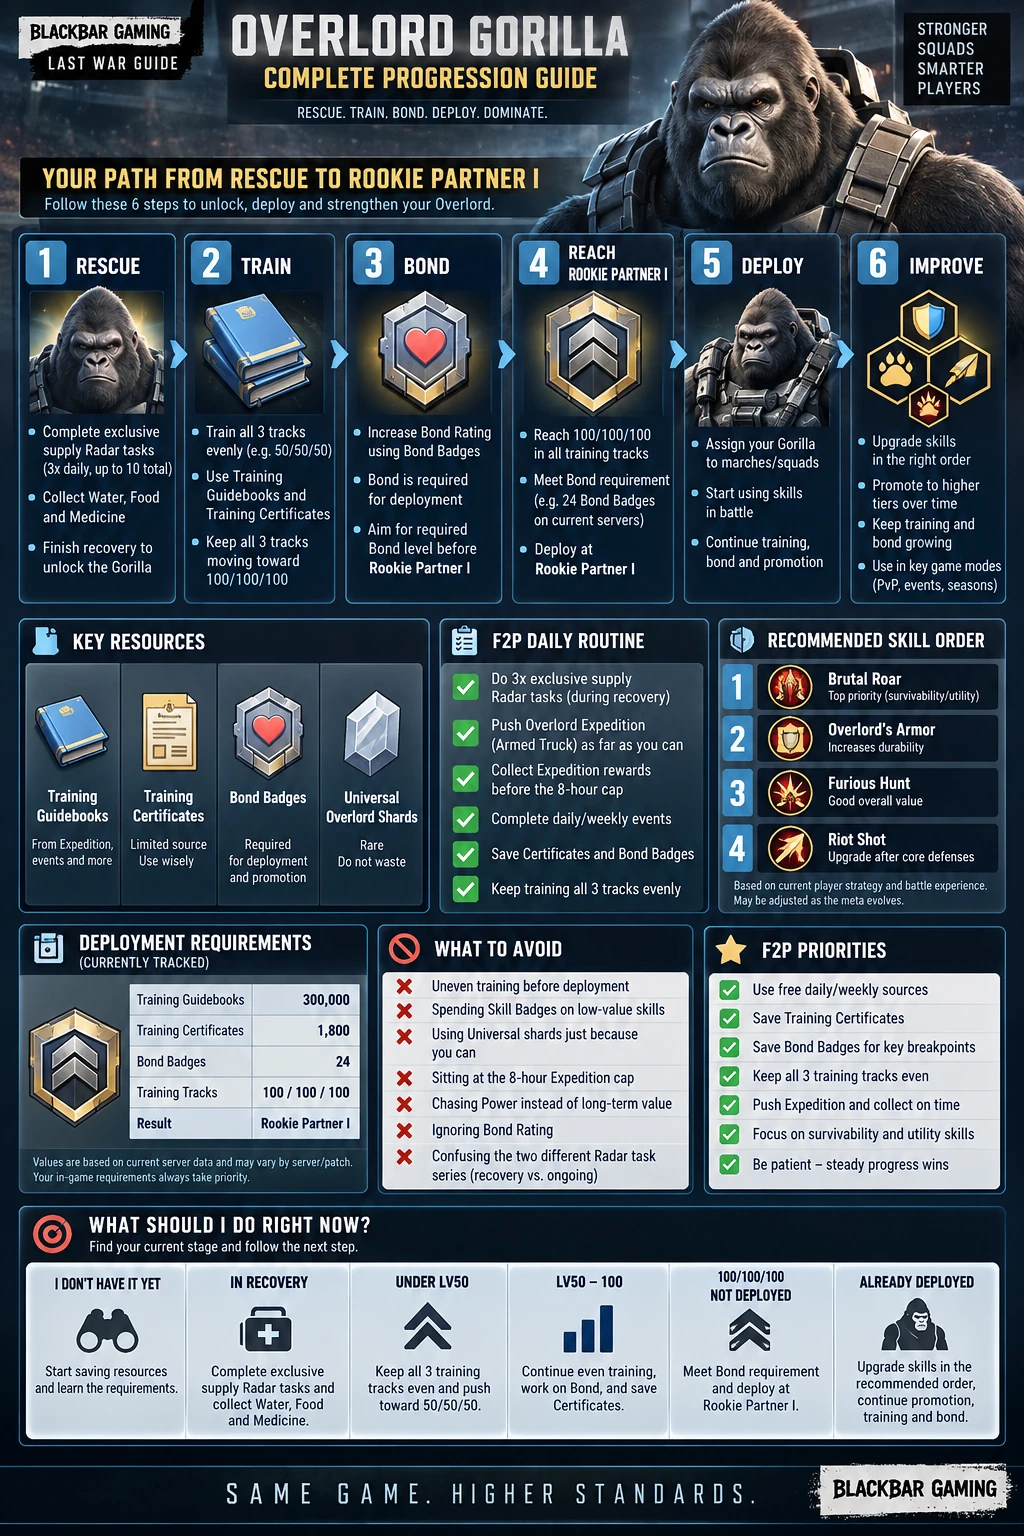
Quick reference only. The written sections below explain the details and server-sensitive notes.
Open the line that matches where you are.
F2P works. It is slower than buying the rush, so consistency and avoiding waste matter more than speed.
During recovery: do every recovery supply Radar task and collect the baby Gorilla's supplies.
Collect Guidebooks: keep the Tactical Institute working and take free Guidebook sources whenever available.
Do Overlord Radar: while the longer Overlord Radar chain is active, complete its daily missions instead of letting them pile up.
Claim Expedition before 8 hours: once idle rewards cap, production stops accumulating.
Push Expedition after upgrades: a higher cleared stage improves your ongoing Overlord rewards.
Use free event/store sources: collect Certificates, Bond Badges, Skill Badges, and shards without forcing paid timelines.
Training Certificates, Bond Badges, Overlord Skill Badges, and Universal Overlord Shards. These are the materials most likely to hurt when spent without a plan.
A spender may deploy very quickly. That does not mean your account is behind. For F2P, the goal is to miss as little free value as possible and avoid resetting progress through bad spending.
Recovery Radar: special supply tasks during healing, appearing 3 times daily, up to 10 total. Longer Overlord Radar chain: a separate progression source with 3 missions per day, up to 42 missions in the tracked rollout. Follow your live server screen if its rollout differs.
Use this order instead of spreading resources everywhere.
Joint Attack, Defense Support, and Survival Training all matter for progression. Before Rookie Partner I, balanced gate progress is more important than maxing your favorite stat.
This is the default practical priority from current later-server testing. If the Gorilla dies too early in your reports, move Overlord's Armor to #1 until survivability improves.
Bond is its own progression path. Do not confuse it with Training or Promotion. Rookie Partner I is the deployment target.
Prefer Gorilla-specific shards when they accomplish the same immediate goal. Do not automatically burn Universal Overlord Shards one at a time just to move the bar.
Start the Gorilla in your strongest/main combat squad unless a specific mode gives you a reason not to. Its value is often survival and utility, not just raw damage.
If the Gorilla dies early, invest in survival. If it stays alive comfortably, additional offensive investment becomes easier to justify.
These are the choices most likely to slow an account.
Missing recovery tasks. Those free recovery sources disappear after healing.
Training only one branch. A neglected track can block your next Bond step.
Letting Expedition sit capped at 8 hours. Capped idle rewards mean lost production time.
Spending Certificates or Bond Badges casually. Use them to clear real progression gates.
Upgrading every skill evenly. Save and concentrate Skill Badges on higher-value skills.
Burning Universal shards automatically. Flexible currency is most valuable when it crosses a useful breakpoint.
Chasing displayed Power or spender speed. Judge your Gorilla by progression efficiency and repeated battle reports.
You do not need to memorize this section. Use it as a reference while progressing.
Current community-tracked progression totals are 300,000 Training Guidebooks, 1,800 Training Certificates, and 24 Bond Badges to reach Rookie Partner I.
Tracked breakdown: all three tracks to Lv50 = 114,000 Guidebooks + 540 Certificates + 2 Bond Badges. Lv50 → Lv100 on all three = another 186,000 Guidebooks + 1,260 Certificates, with the remaining 22 Bond Badges used through the Bond ladder.
Your live game screen wins if a later rollout shows different costs.
Your highest cleared stage determines idle-reward quality. Higher stages improve ongoing rewards and the quality odds of Overlord Supply Chests.
Idle rewards cap at 8 hours. Hourly settlement includes Training Guidebooks and Overlord Skill Badges, with a chance for Overlord Supply Chests. Claim before the cap and retry higher stages after meaningful squad upgrades.
Training uses Guidebooks and Certificates across three tracks. Bond Rating advances after required training conditions are met and leads to the deployment gate. Promotion uses Overlord shards and develops titles, attributes, skill stars, and gear progression.
They are separate systems. A large displayed Power increase does not mean one of them can substitute for another.
Expert Overlord is tied to later Promotion progression and is not the same early Skill Badge decision as Brutal Roar, Armor, Furious Hunt, or Riot Shot. Do not drain early Skill Badges trying to force a later unlock.
Current retained client material contains conflicting/version-sensitive treatment of Overlord in Transfer Score. Use the live Transfer event screen on your server rather than assuming inclusion or exclusion is universal.